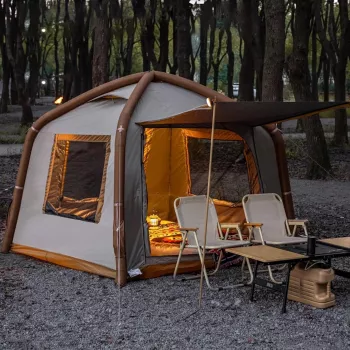
An automatic inflatable camping tent with a canopy is built for speed: unfold, inflate, secure, and you’re essentially done. The fastest setups come from doing a quick site check first, keeping the pump ready, and anchoring the tent as it takes shape so it doesn’t shift in the wind.
Pick the flattest area you can and clear rocks, sticks, and pinecones. Aim the tent door away from strong wind and plan where the canopy will extend so it won’t land on a bush or slope. Lay down a groundsheet if you use one.
Unroll the tent with the canopy side facing the direction you want shade (typically toward afternoon sun). Spread the corners so the base is roughly square/rectangular and the air beams aren’t twisted.
Before inflating, stake at least the two corners facing the wind. This keeps the tent from “walking” as the air beams rise. If the tent includes a base strap system, keep it flat and untangled.
Connect the pump to the main inflation valve and start pumping. As the structure lifts, guide the fabric so it doesn’t snag. Inflate to the manufacturer’s recommended pressure (many tents feel firm but not drum-tight). Close the valve cap securely to prevent slow leaks.
Stake the remaining corners, then add guylines to the primary points (especially on the windward side). For the canopy, extend its support poles (if included), clip/attach the canopy edge, and stake the canopy corners so it forms a clean, tensioned awning.
Walk around once: confirm stakes are angled away from the tent, guylines are snug, vents are open, and seams aren’t overstressed. If wind picks up, add extra guy points before relaxing.
For a more detailed step-by-step with timing tips and troubleshooting, visit the main guide here.
Check that the valve is fully closed and the cap is tight, then top off to the recommended pressure. If it softens again, inspect for a slow leak at the valve connection or a small puncture and patch it per the tent’s repair kit instructions.


Leave a comment